


Hello and welcome to this week’s tip of the week!
This week we’re going to look at Google Calendar, a free app that is part of Gmail, and how you can use it to stay organized, meet deadlines, schedule meetings, and more. Let’s get started!
First things first, you need to open Google Calendar. There are a couple of ways you can do this (Note: you must have a Gmail account):
- Go to: https://www.google.com/calendar/
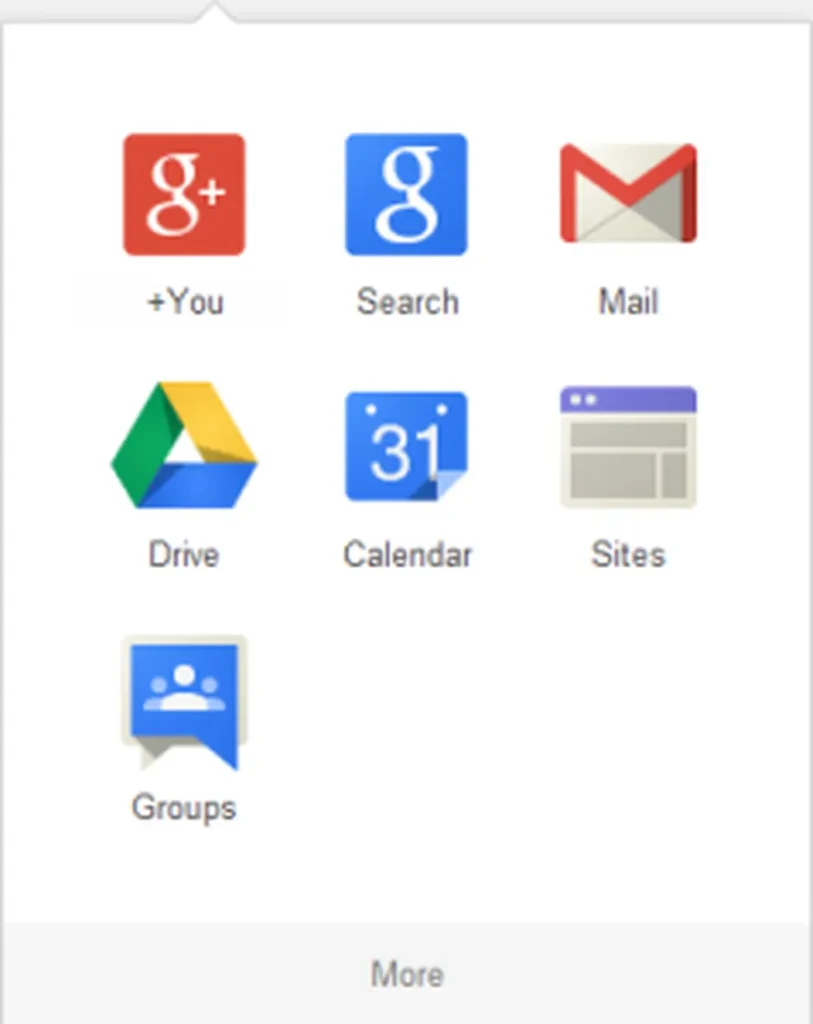
- Click on the Google Apps icon in the upper right corner of your Gmail account (if you use the Chrome web browser, this icon is also in the upper right corner of the default Chrome homepage). It looks like this:

From there, click on Google Calendar from the dropdown to open it.
You’ll first need to create your calendar. When you create a Gmail account, a calendar will be automatically created for you. However, if you would like to create a new one, you can do so by clicking on the little arrow next to “My Calendars” and then selecting “Create new calendar.”

Doing so will bring you to the following page where you can fill in information such as the calendar name, a calendar description, the calendar’s location/time zone, and you can even share your new calendar with others or make it public.
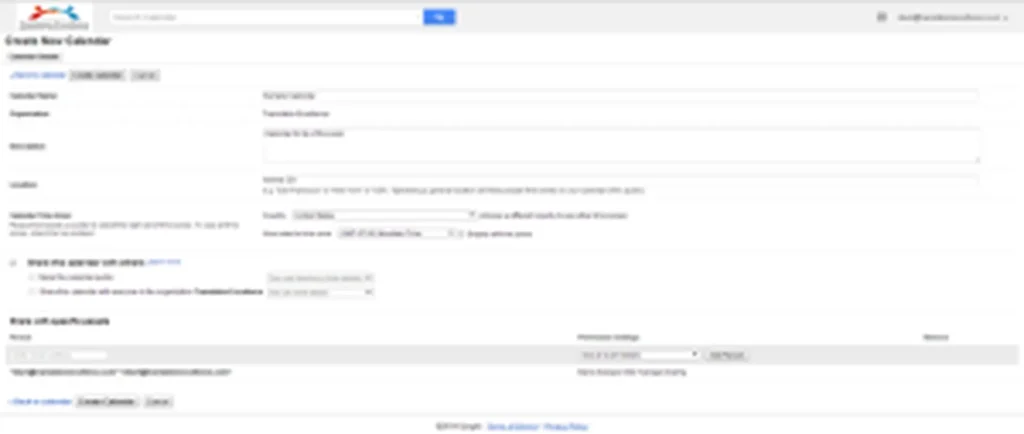
If you would like to edit these settings for an existing calendar, simply click on the “Settings” for that calendar.
Now that your calendar is set up, the real fun begins. Let’s create our first event. To create an event we have three different options; here are my unofficial names for them:
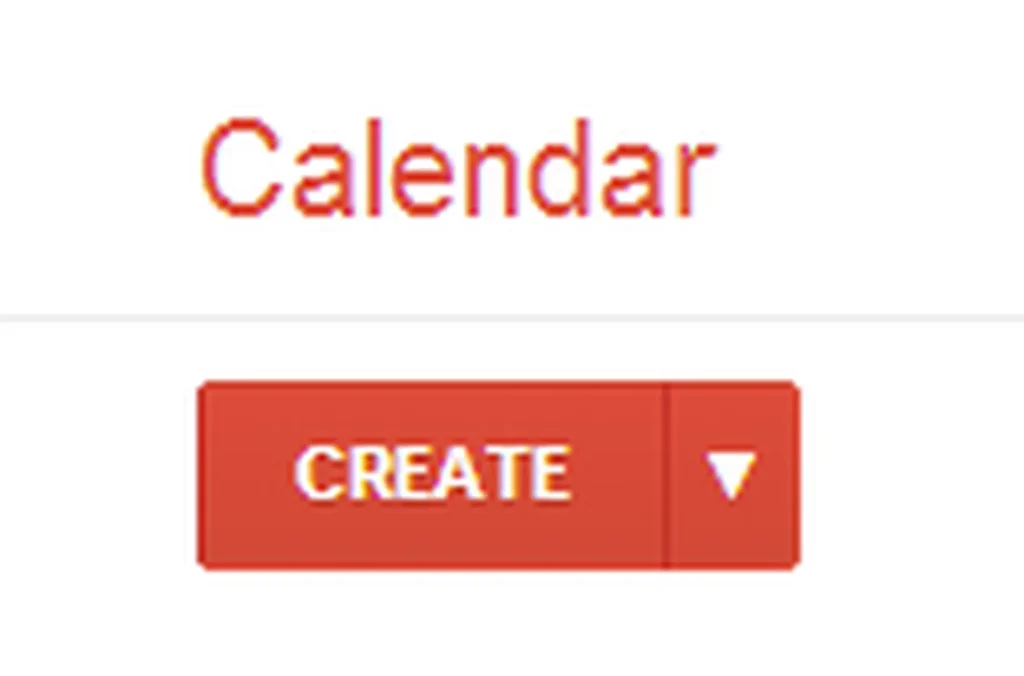
1. Quick Add: This one actually is the official name. To access it, simply click on the little arrow next to “Create”. From there, type in the event along with the time and date. The below example would create an event at 7 p.m. tomorrow that was titled “Dinner with Michael.” The event would default to a length of one hour.2. Click Add: This one is the one I use most because I think it’s the quickest. Click on the starting hour for your event and drag your mouse to the ending time. Again, the default is one hour so if you just click on 2:00 p.m. (what I did below), it will create an event from 2:00 p.m. – 3:00 p.m. You can then add a title to the event and if you’d like to add more information, you can click on “Edit event” (more on this below).

3. Standard Create: Finally we have the standard way to create an event, for this, simply click on “Create.” Doing so will bring up a window which I will break down below. If you chose option two and then clicked “Edit event,” this is the same window that would pop up.

First we have the title and time. Here you can title your event, choose the date, the time range, and even the time zone. We’ve found the time zone feature to be extremely handy for things such as interpretation assignments taking place in other states.
You’ll also notice the checkboxes “All day” and “Repeat…” These will allow you to either create an event that lasts all day, or repeat an event for any number of days, weeks, months, or years. The “Repeat…” checkbox can be a great reminder for long-term assignments, weekly meetings, or weekly administrative tasks.

Next, we’ll add more details. Since the event I’m creating is for a translation, I haven’t entered a location however that field is great for interpretation assignments and meetings. You can also choose which calendar to add the event to, add a description, and attach documents. The video call option is for Google + Premium users so I won’t go into it for this post. If you would like to learn more about this service, click here.

One of the best parts is being able to easily add guests. Just type in an email address and you’ll send them an invitation! Below I’ve shared the event with my personal calendar (“Nathanael Burt”).
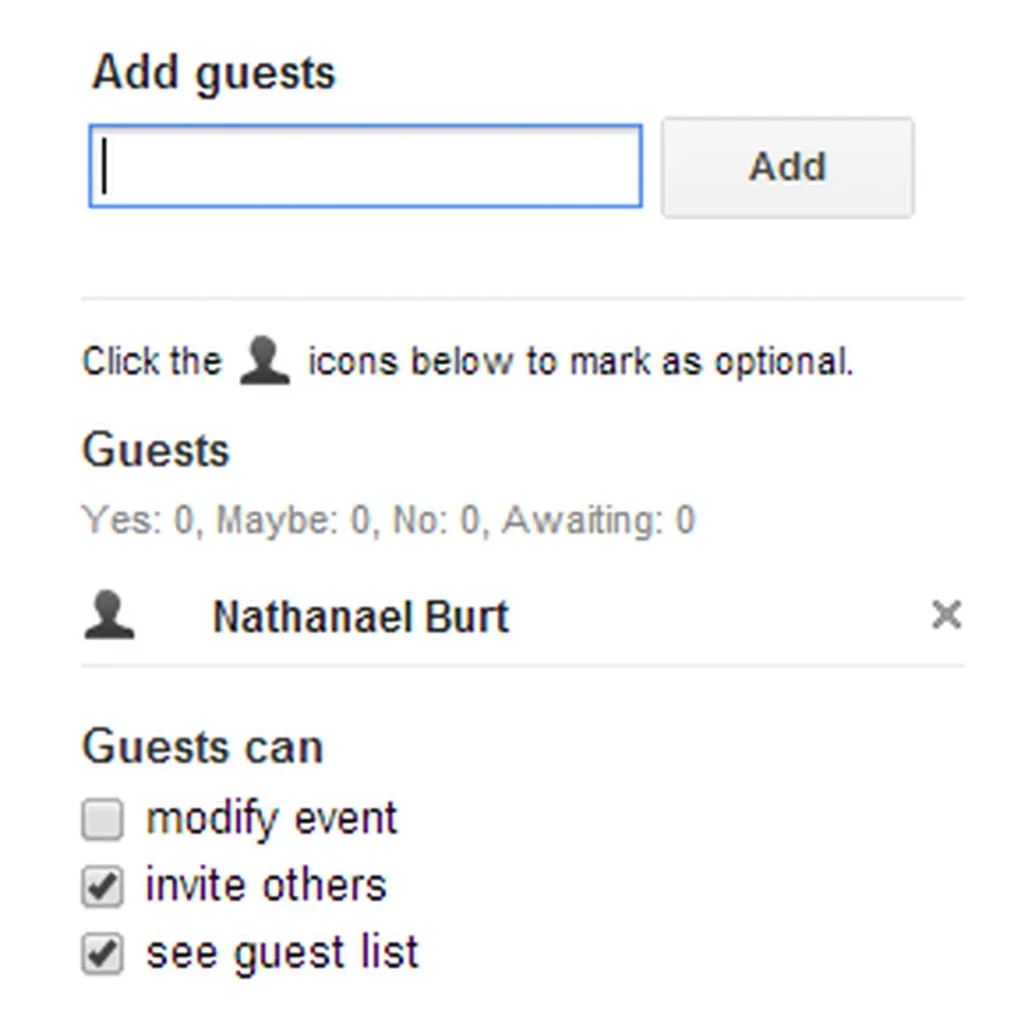
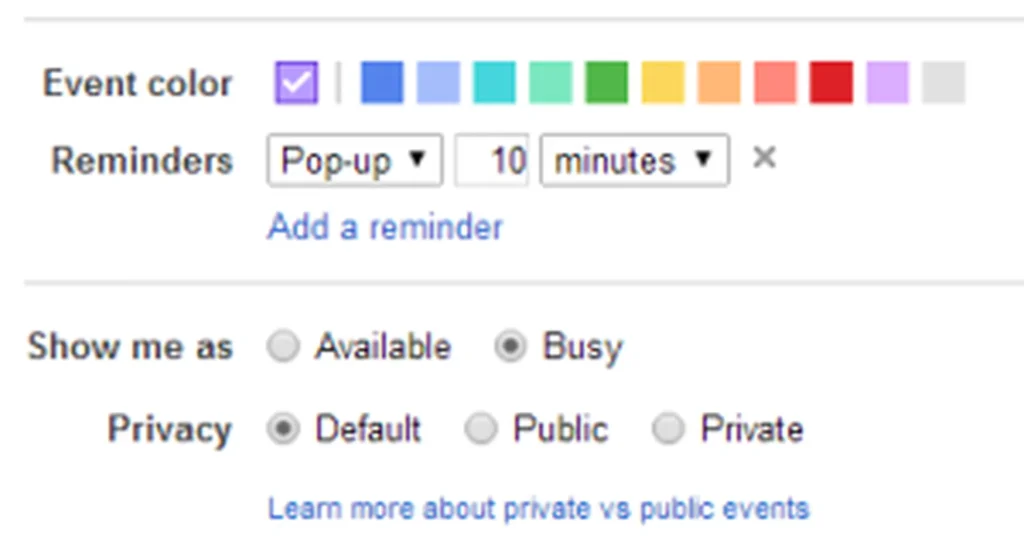
At the bottom of the “Edit event” menu you can do a couple of other things.
- Choose a color for the event on your calendar
- Set reminders for the event
- Choose whether you want others to see you as “Available” or “Busy”
- Change the privacy settings of the event (learn more here)
Then hit “Save” up top and pat yourself on the back since you’ve just created your first event!
Here it is:
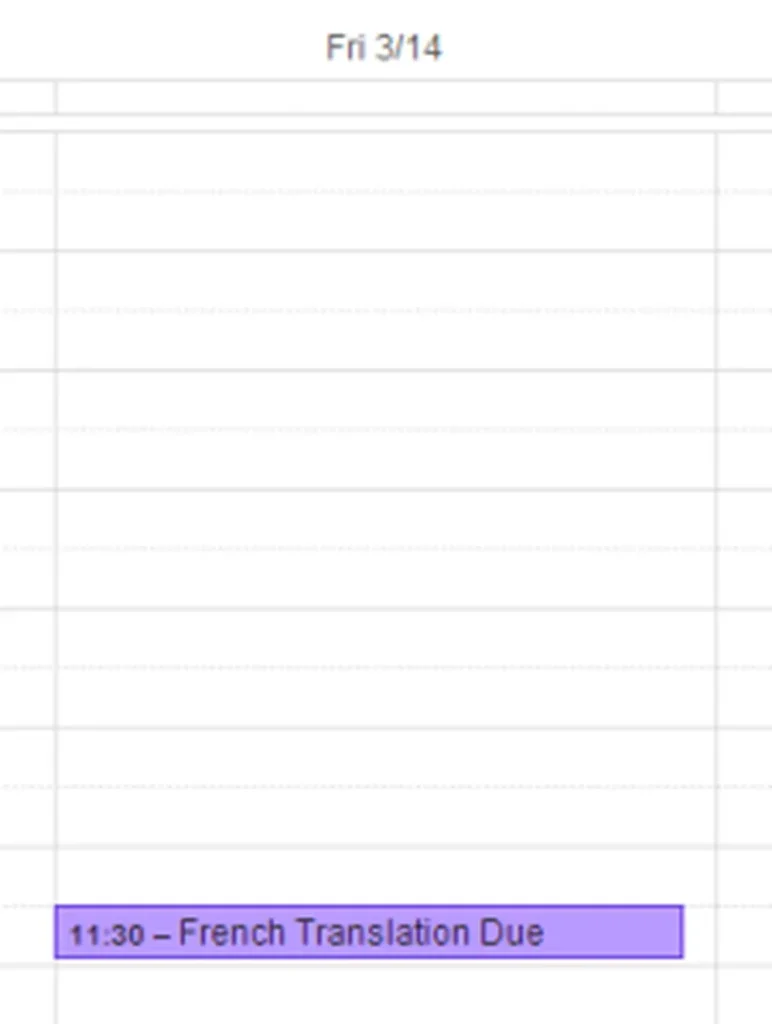
You can now move the event to another time slot by dragging it, and if you click on it once a menu will pop up allowing you to either delete the event or edit it some more.
Another way to stay organized with Google Calendar is to use “Tasks,” which you will find under “My Calendars” as a default calendar.
When you click on it, it will bring up a side bar on the right. To add tasks, simply type in the space next to the little check box. You can add more tasks by hitting “Enter.” You can also add tasks by hitting the “+” button at the bottom of the page but I think this first option is the easiest.

You can also create new lists by clicking on the image of bulleted lines at the bottom. This could be great for different sets of tasks. For example, you could separate your daily work tasks, long-term tasks, and grocery list.

Now, all that’s left is to check off the tasks you have completed and then happily delete them by hitting the trashcan icon at the bottom.

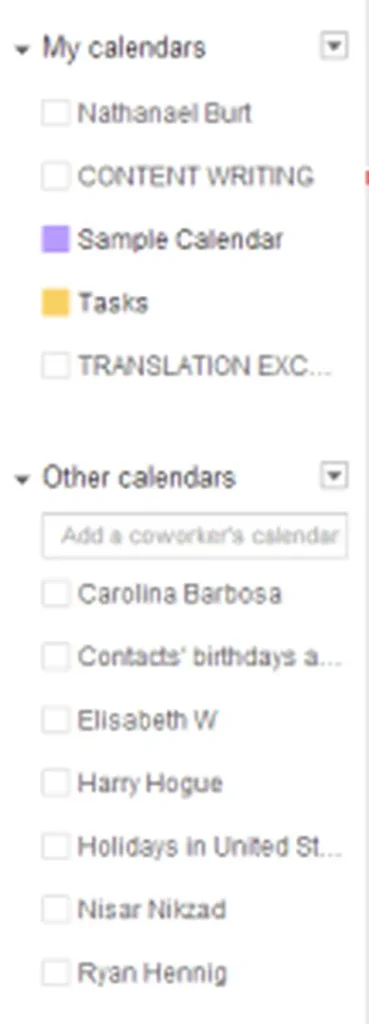
One of the last things I want to talk about is the sharing feature of Google Calendars. This feature is so awesome because it enables you to see when you’re colleagues are available or busy without having to email them and also allows colleagues to see your schedule. Gone are the days of long email threads to schedule a meeting; just find a time where you’re colleagues are free!
You’ll be able to see all your calendars and the calendars people have shared with you (under “Other Calendars”) on the left side of the calendar app. The ones that have a colored box are currently being shown on your calendar, the ones without it are toggled off.
To share a calendar, simply hover over it with your mouse and then click on the little triangle that appears to the right.
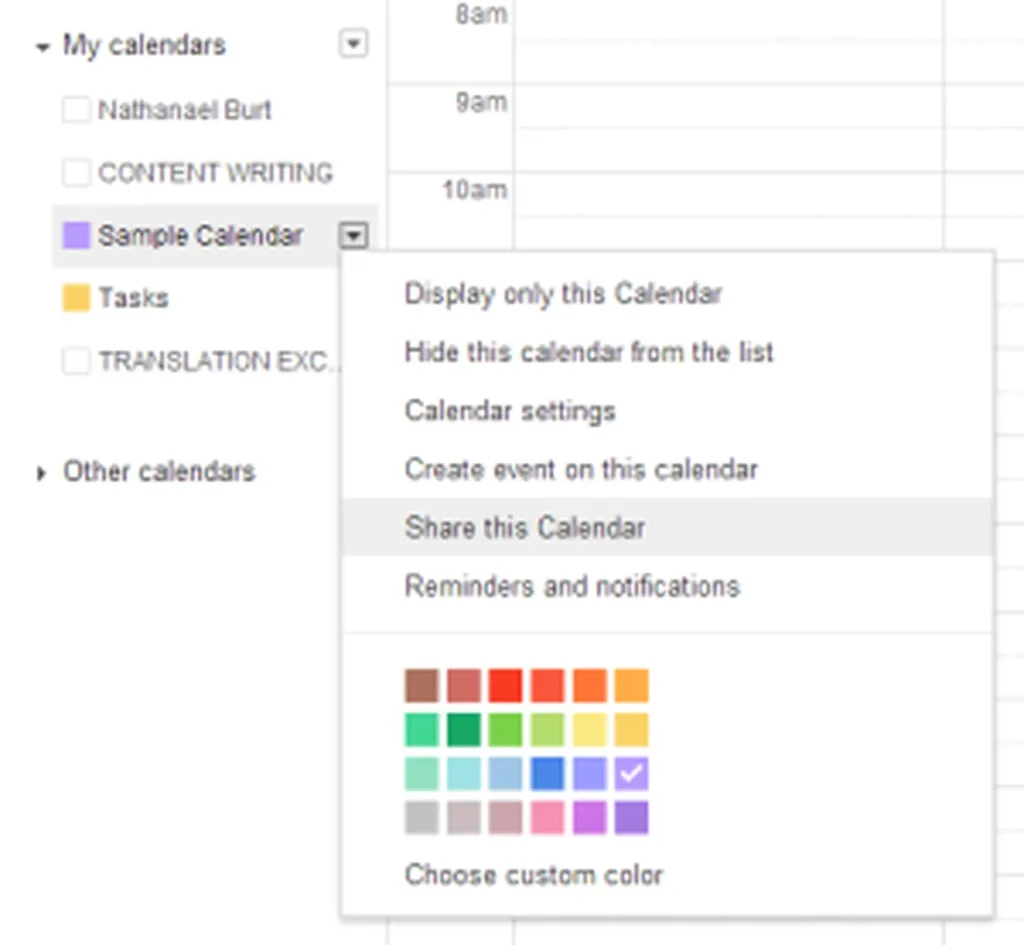
Then, just enter in the email addresses of the people you would like to share it with. You can see I have shared my “Sample Calendar” with myself.

Finally, we have event reminders. You can edit these settings in your calendar preferences. This is located next to “Share this Calendar” on the Calendar Details and is called “Reminders and notifications” (see above screenshot).
You can create reminders for yourself so if a colleague creates, changes, cancels, or responds to an event, you’ll receive an email notification. There is also an option to receive a daily schedule update with all your events for that day.

There we have it — Google Calendar.
Now, I’d love to hear from you. Do you use Google Calendar for work or your personal life? Is there another calendar program that you like better? Let me know in the comments below!
Hello and welcome to this week’s tip of the week!
This week we’re going to look at Google Calendar, a free app that is part of Gmail, and how you can use it to stay organized, meet deadlines, schedule meetings, and more. Let’s get started!
First things first, you need to open Google Calendar. There are a couple of ways you can do this (Note: you must have a Gmail account):
1. Go to: https://www.google.com/calendar/
2. Click on the Google Apps icon in the upper right corner of your Gmail account (if you use the Chrome web browser, this icon is also in the upper right corner of the default Chrome homepage). It looks like this: